User Guide Manual
Content Management System
1. System Requirements
Before you begin, ensure you have the following:
- A compatible Android TV (Version 11 or above)
- Stable internet connection (Wi-Fi or Ethernet)
- Hype Loop Publisher App installed from the Play Store
- Hype Loop TV App installed from the Play Store
- File Manager App installed from the Play Store
- VLC Media Player App installed from the Play Store


2. Registration & Login
To use the system, you need to register as a publisher and log in.
2.1 Visit the Hype Loop Website
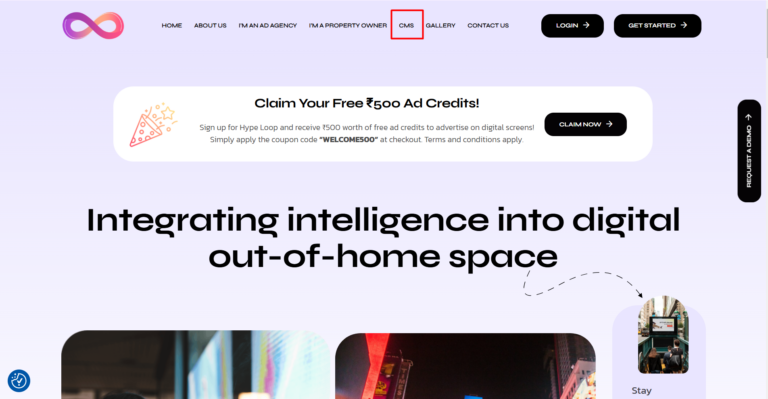
- Open a web browser on your PC or mobile.
- Visit the Hype Loop website.
- Navigate to the CMS (Content Management System) tab.
- Click on “Get Started”.
2.2 Register as a Publisher
- Enter the following details:
- First Name & Last Name
- Active Email ID
- Password (Create a strong password)
- Business Name
- Current Address where TV is placed
- GST Number (Optional)
- City/Town
- Country
- Accept the Terms and Conditions.
- Click “Register” to submit your details.
- Alternatively, click “Sign Up using Google” for quick registration.
2.3 Verify Your Email ID
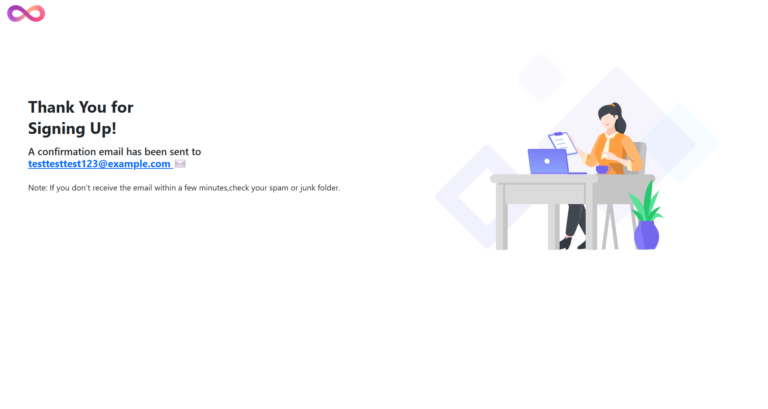
- Check your registered email inbox for a verification link.
- Click “Verify Account” to activate your account.
2.4 Log in to Your Account
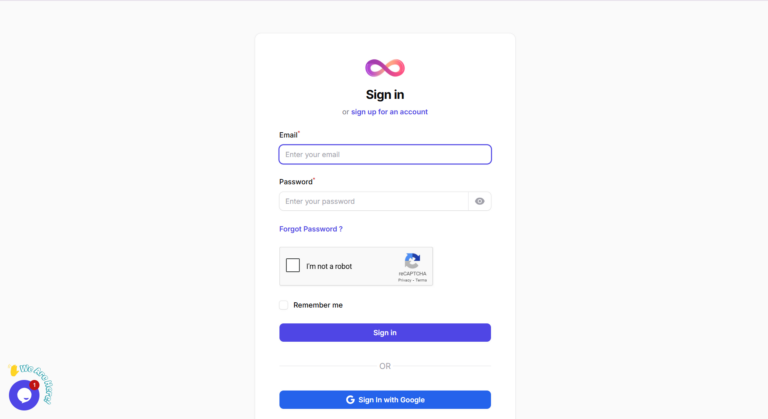
- Enter your email ID and password.
- Click “Login” to access the admin panel.
3. Add Screen Details
After logging in, you must add your screens to start displaying content.
3.1 Access the Admin Panel
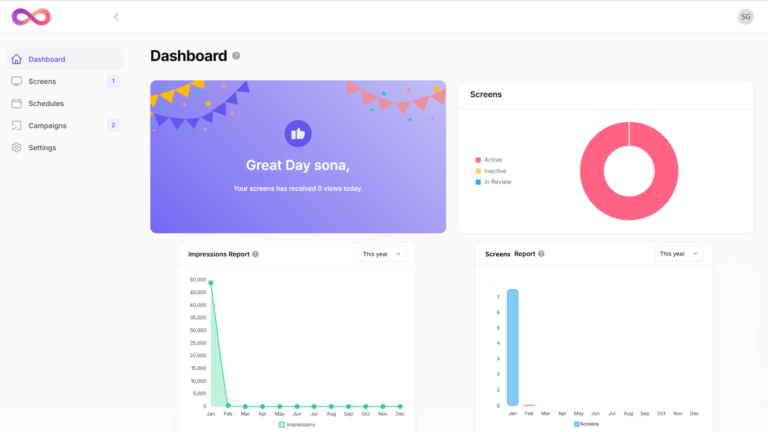
- After login, you will be redirected to the Admin Panel.
3.2 Add a New Screen
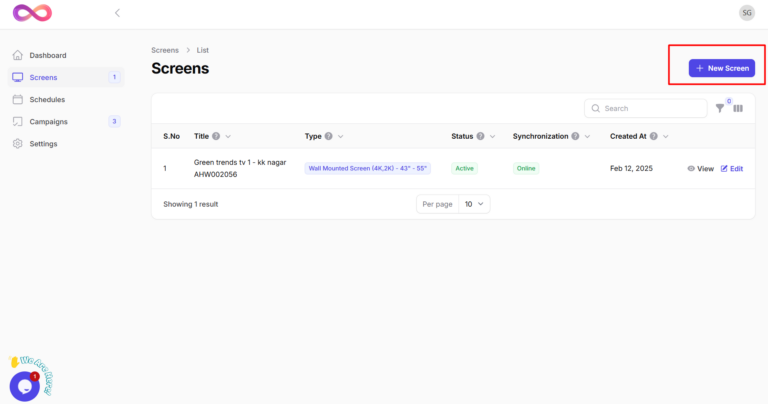
- Click on “Screens” in the left panel.
- Click “New Screen”.
3.3 Enter Screen Details
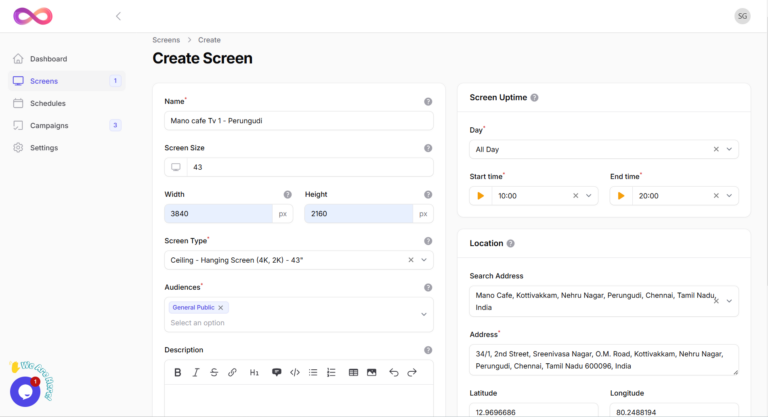
- Screen Name (e.g., Mall Entrance Display, Café TV Screen).
- Screen Specifications:
- Screen Size (e.g., 43 inches, 55 inches).
- Screen Width & Height in Pixels.
- Screen Type Format (e.g., Ceiling-mounted, Wall-mounted, HD, 4K).
- Audience Type: Specify the type of people visiting the place (e.g., students, professionals, shoppers).
- Screen Uptimes:
- Days: Select the days the screen is operational.
- Start Time: Time when the TV is turned on.
- End Time: Time when the TV is turned off.
- Location: Enter the tv screen placed location using the map.
- Click “Create”.
3.4 Screen Review & Approval
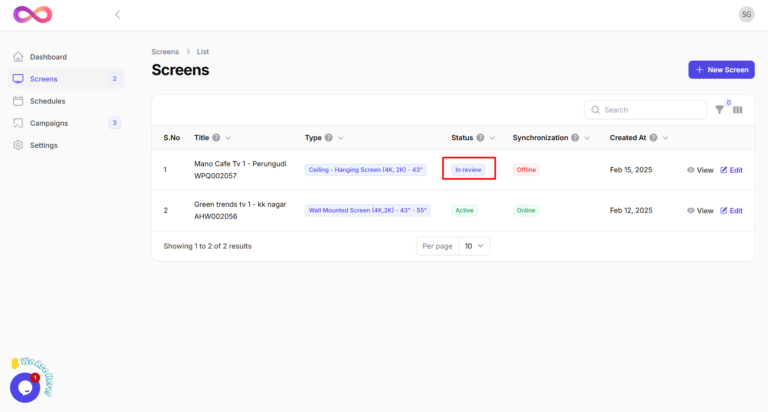
- The screen will be submitted for review to the Hype Loop team.
- Once approved, the screen will be activated and ready for content display.
4. Sync Publisher App with TV App
To start displaying content, you must sync the Hype Loop Publisher App with the Hype Loop TV App.
4.1 Install Required Apps
- On Your Mobile: Download the Hype Loop Publisher App from the Google Play Store.
- On Your TV: Download the Hype Loop TV App from the Google Play Store.
4.2 Login to the Publisher App
- Open the Publisher Mobile App.
- Enter the same login details used during registration.

- Navigate to “Screens” at the bottom menu.
- Select the screen you created in the Admin Panel.
4.3 Scan QR Code for Synchronization

- Select “Scan QR Code” in the Publisher App.
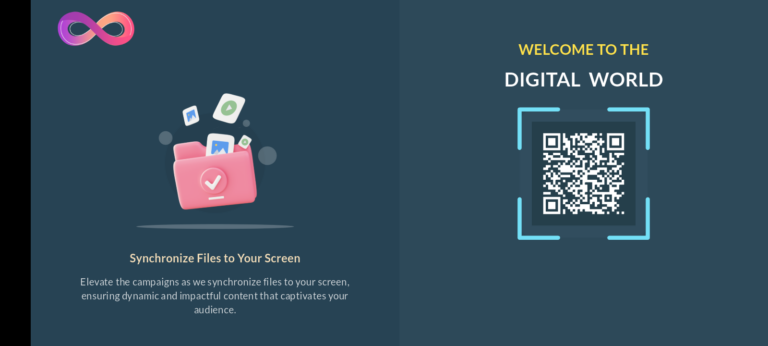
- Open the Hype Loop TV App on your TV.
- Scan the QR code displayed on the TV using the Publisher App.
- Click “Login” in the Publisher Mobile App.
- Once connected, the Publisher and TV App will sync automatically.
5. Upload Content & Create Campaigns
To start displaying content, you must sync the Hype Loop Publisher App with the Hype Loop TV App.
5.1 Create a New Campaign
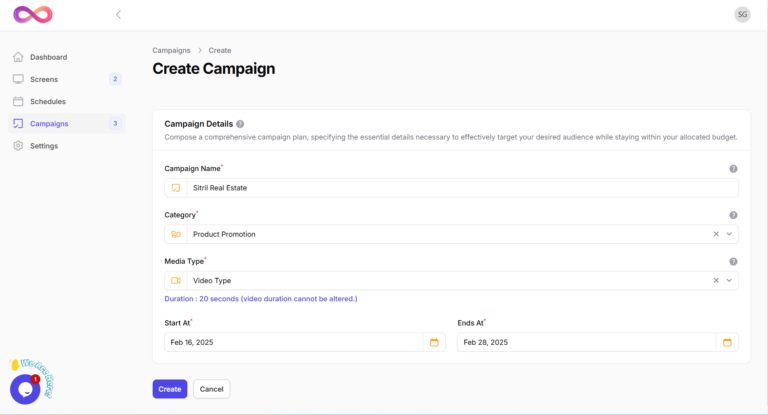
- Click on “Campaigns” in the Admin Panel.
- Click “New Campaign”.
- Enter Campaign Name (e.g., Weekend Offers, New Store Launch).
- Set the Campaign Duration (start and end date/time).
- Select Media Type:
- Poster Content (Image ads)
- Video Content (Video ads)
- Click “Create”.
5.2 Assign Screens to the Campaign
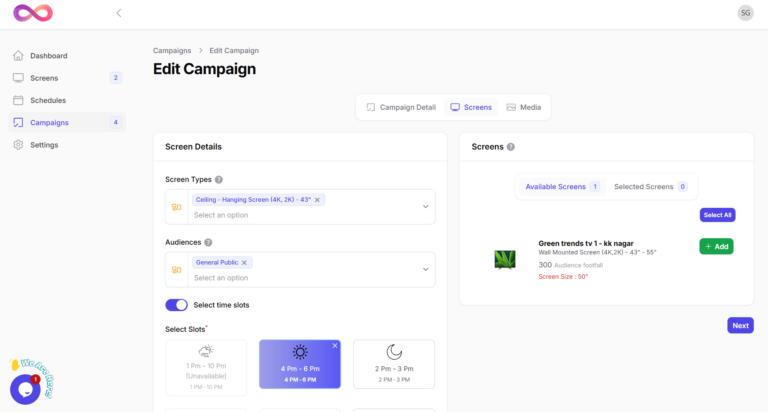
- Choose the screen type where you want to display the content.
- Search Location: Select the screen location.
- Click “Apply”.
- Select the screens where the content should be displayed.
- Click “Submit”.
5.3 Upload Creative Content
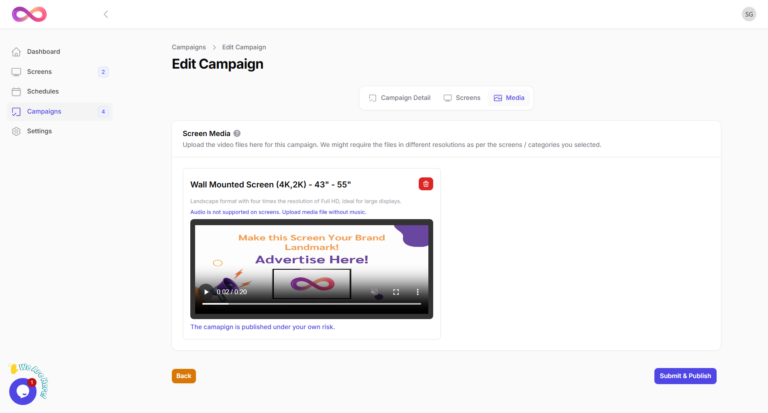
- On the Media Page, upload your poster or video ads.
- Upload the content based on the specifications.
- Click “Submit” to finalize the campaign.
- Click “Publish” in the campaign overview page to start displaying content based on the campaign start date.
6. Manage Campaigns
Once the campaign is live, you can manage it in the Admin Panel.
6.1 Pause a Campaign
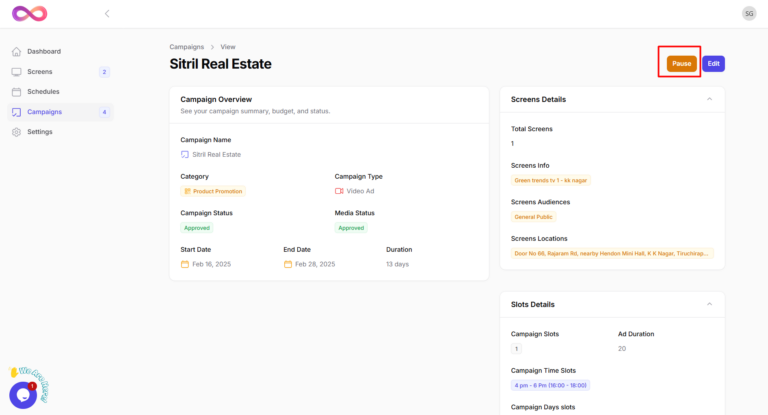
- Navigate to “Campaign Overview”.
- Click “Pause” to temporarily stop the campaign.
6.2 Resume a Campaign
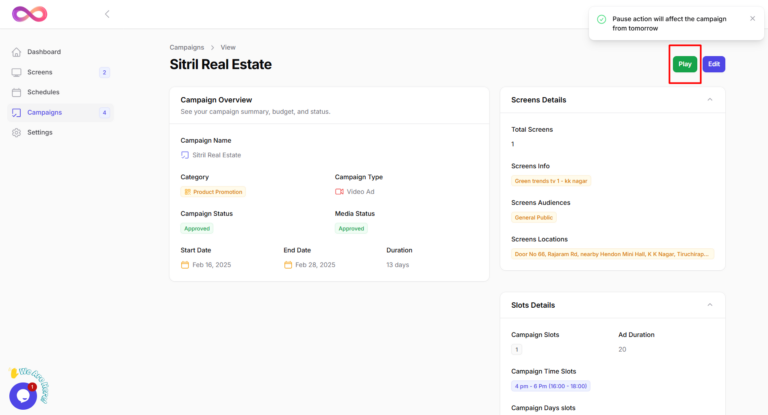
- Go to “Campaign Overview”.
- Click “Play” to resume the campaign.
6.3 Edit Content in a Campaign
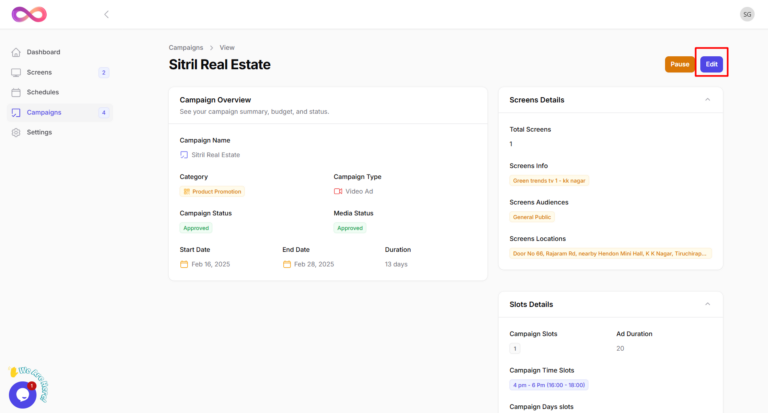
- Click “Edit” on the Campaign Overview page.
- Modify campaign details such as media and duration.
- Click “Publish” to update changes.
7. Monitoring & Reports
7.1 Campaign Overview
- Click on a campaign name to access Campaign Overview.
- View the campaign’s status, duration, and assigned screens.
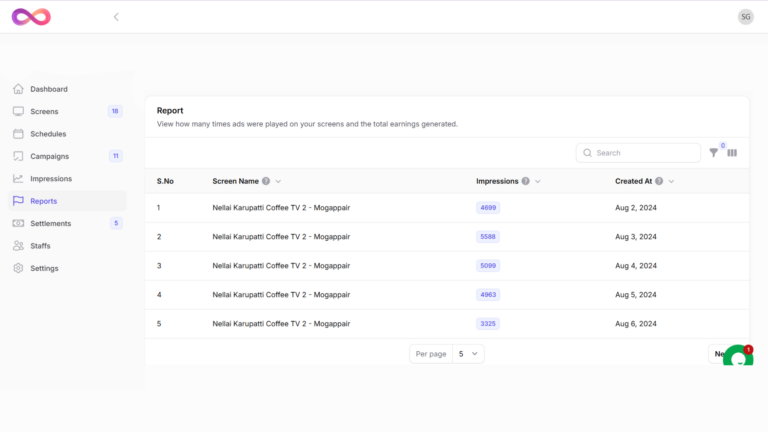
7.2 Performance Reports
- View impressions and audience engagement.
- Check which screens are performing best.
8. Troubleshooting & Support
8.1 Common Issues & Solutions
- App Not Syncing: Ensure the TV is connected to the internet.
- Campaign Not Displaying: Check if the screen is active and the campaign is published and check internet connectivity.
- Login Issues: Reset password using “Forgot Password”.
8.2 Contact Support
- Email: support@thehypeloop.com
- Phone: +91 6381286119
